- HubSpot Community
- Resources
- Releases and Updates
- Introducing Lead Flows for HubSpot Marketing
Releases and Updates
Search
Releases and Updates
Turn on suggestions
Auto-suggest helps you quickly narrow down your search results by suggesting possible matches as you type.
Showing results for
Options
- Subscribe to RSS Feed
- Mark as New
- Mark as Read
- Bookmark
- Subscribe
- Printer Friendly Page
- Report Inappropriate Content
- Subscribe to RSS Feed
- Mark as New
- Mark as Read
- Bookmark
- Subscribe
- Printer Friendly Page
- Report Inappropriate Content
Nov 9, 2016
5:01 PM
Introducing Lead Flows for HubSpot Marketing
Editor's Note: If you're a HubSpot Marketing customer, you already have all the features available in the HubSpot Marketing Free product right within your HubSpot Marketing account -- including Lead Flows!
Lead Flows allows HubSpot Marketing and HubSpot Marketing Free customers to create pop-up forms. But, are pop-up forms truly inbound? It really depends on the intention and execution -- but non-interruptive or annoying pop-ups can be inbound, and the data proves they work.
AWeber found that using a pop-up form for obtaining blog subscribers converted 1375% better than a traditional form. For more data, and what truly makes a pop-up form inbound read this post on should marketers use pop-up forms?
Within HubSpot now you can create your own pop-up forms, and easily insert them on your content. To get started just head to the Products & Add-on screen and click "activate" under Lead Flows. Once activated a new options called Lead Flows will display under the Content menu and will guide you through the form creation process. Let's step through the process of creating an inbound-oriented pop-up.
Select the Flow Type:
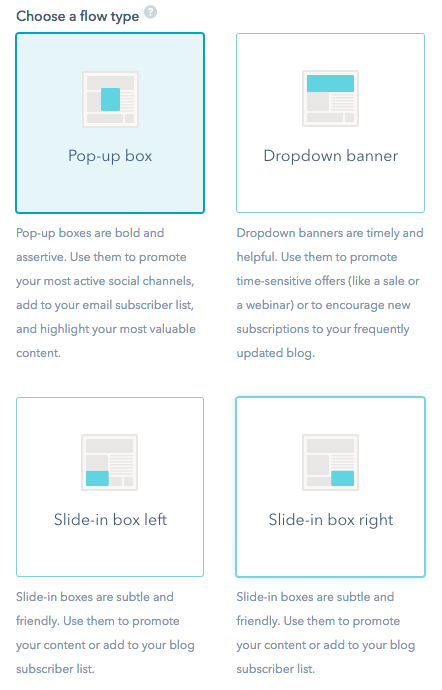 When you create a new Lead Flow, the first-step is to select the type you want to create. Depending on the page you are adding this flow to consider the user experience and where it would be best for the visitor to not only notice the pop-up, but also where it can also support the goal of the page.
A page with a lot of text content may be best served to have a slide-in banner or the top banner, whereas the pop-up may be best for more important situations that require the attention of your visitor.
In a step below, we'll be able to trigger specific conditions when these pop-ups display, such as scrolling 50% of the way through the page.
In the mean-time, let's dive-in to the second step of creating a Lead Flow.
Add a featured image, color, and text:
In this step you can add an image to your post, define a color that matches your brand and customize the text within the Lead Flow and also within the button. Colors are pre-selected for conversion, but you can customize them and insert your own custom color using a hex code.
Add form questions:
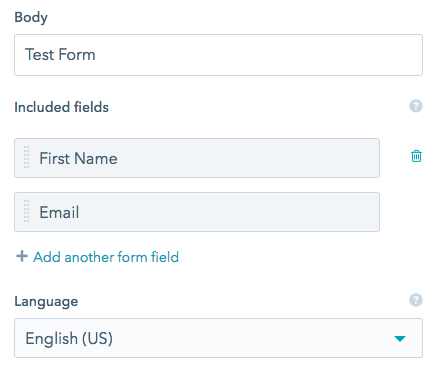 Now you can add form questions to your Lead Flow. We recommend keeping this as short as possible. Lead Flows should not replace your traditional HubSpot forms, but are great for micro-conversion points like blog subscriptions. Any form fields added here will sync back to your HubSpot contact properties and be available for list segmentation.
When you're done defining the questions in the form, you can move to the next step and include a thank you message that is included after someone completes your Lead Flow.
Choose when and where your Lead Flow will display:
In the Options step you can choose when and where your Lead Flow will display. For any pages that are hosted by HubSpot, or already have the HubSpot tracking code installed, simply include the URL you want it to display.
We recommend considering the experience for flow triggers, and utilizing the 50% page scroll, time elapse, or exit intent to show the Lead Flow where relevant.
After you're done defining these options you can preview your finalized Lead Flow and publish it. Lead Flows is now available to all HubSpot Marketing customers. Simply navigate to the Products & Add-ons screen in your Settings to activate it.
{{cta('991dad17-862c-4402-8781-2548a7990325')}}
Latest blog posts
- Updated in the App Marketplace: Essential Apps for Marketers
- New in the App Marketplace: Essential Apps for Customer Service
- reCAPTCHA opt-out for Commerce Hub Checkout
- [Live] Try invoices without enrolling in Commerce Hub
- [Live] Collect payments locally through PADs (Canada) in Commerce Hub
- [Live] Collect payments through BACs (UK) on Commerce Hub
- March 2024 Release Notes
- [Live] Accept Partial Payments on Invoices
- [Live] Display Multiple Tax IDs on Invoices
- [Live] Commerce Hub Subscription Timeline Card
You must be a registered user to add a comment. If you've already registered, sign in. Otherwise, register and sign in.